Rayon is known for its soft drape and excellent color absorption—but many people hesitate to dye it because they’re unsure how it reacts to water, heat, and chemicals.
The good news? Dyeing rayon is absolutely possible, and when done correctly, it produces rich, vibrant results.
This step-by-step guide focuses specifically on:
-
dyeing rayon
-
dyeing rayon with Rit
-
Preventing shrinkage and damage
-
Achieving long-lasting color
1. Can You Dye Rayon?
Yes. Rayon is made from regenerated cellulose (like cotton), which means it absorbs dye very well.
In fact, rayon often:
-
Takes color more deeply than cotton
-
Produces brighter, more saturated tones
-
Accepts fiber-reactive and all-purpose dyes
However, rayon becomes weaker when wet—so gentle handling is crucial.
2. What Dye Works Best for Rayon?
Option 1: Fiber-Reactive Dye (Best Results)
-
Produces permanent, wash-fast color
-
Ideal for 100% rayon
-
Requires soda ash fixer
Best for: Long-lasting, professional-level results.
Option 2: Dyeing Rayon with Rit (Most Accessible)
Rit All-Purpose Dye works well on rayon because it contains dyes formulated for cellulose fibers.
Best for:
-
Home dyeing
-
Small projects
-
Beginners
Rit is widely available and simple to use—but results may be slightly less permanent than fiber-reactive dyes.
3. Before You Start: Important Preparation
Check the Fabric Content
-
100% rayon → dyes evenly
-
Rayon blends → may dye unevenly (polyester won’t absorb dye)
Prewash the Garment
Always wash without fabric softener to remove:
-
Dirt
-
Oils
-
Factory finishes
This ensures even dye penetration.
4. Step-by-Step: Dyeing Rayon with Rit (Stovetop Method Recommended)
dyeing rayon with rit
The stovetop method gives the most even, saturated results.
What You’ll Need
-
Rit All-Purpose Dye
-
Large stainless steel pot
-
Hot water (not boiling)
-
Salt (for cotton/rayon fabrics)
-
Rubber gloves
-
Stirring tool
Step 1: Fill the Pot
-
Add enough water so fabric can move freely
-
Heat to about 60–70°C (140–160°F)
-
Do not boil (boiling can damage rayon)
Step 2: Add Dye
-
Shake liquid dye well (or dissolve powder fully)
-
Stir thoroughly
-
Add 1 cup of salt (helps deepen color on rayon)
Step 3: Add Fabric (Wet First!)
Rayon must be fully wet before entering the dye bath.
This prevents streaking and blotching.
Step 4: Stir Constantly
For the first 10 minutes:
-
Stir continuously
-
Ensure even exposure
Continue dyeing for 30–60 minutes depending on desired depth.
Step 5: Rinse & Wash
-
Rinse in warm water
-
Gradually cool the water
-
Wash separately with mild detergent
-
Air dry (avoid high heat)
5. Common Problems When Dyeing Rayon
❌ Shrinking
Rayon shrinks with:
-
High heat
-
Aggressive agitation
Solution:
-
Use controlled warm water
-
Avoid boiling
-
Handle gently when wet
❌ Uneven Color
Caused by:
-
Dry spots
-
Insufficient stirring
-
Fabric blends
Solution:
-
Pre-wet thoroughly
-
Stir constantly
-
Use enough water
❌ Weak Fabric After Dyeing
Rayon loses strength when wet.
Avoid wringing or twisting. Support the garment fully when lifting.
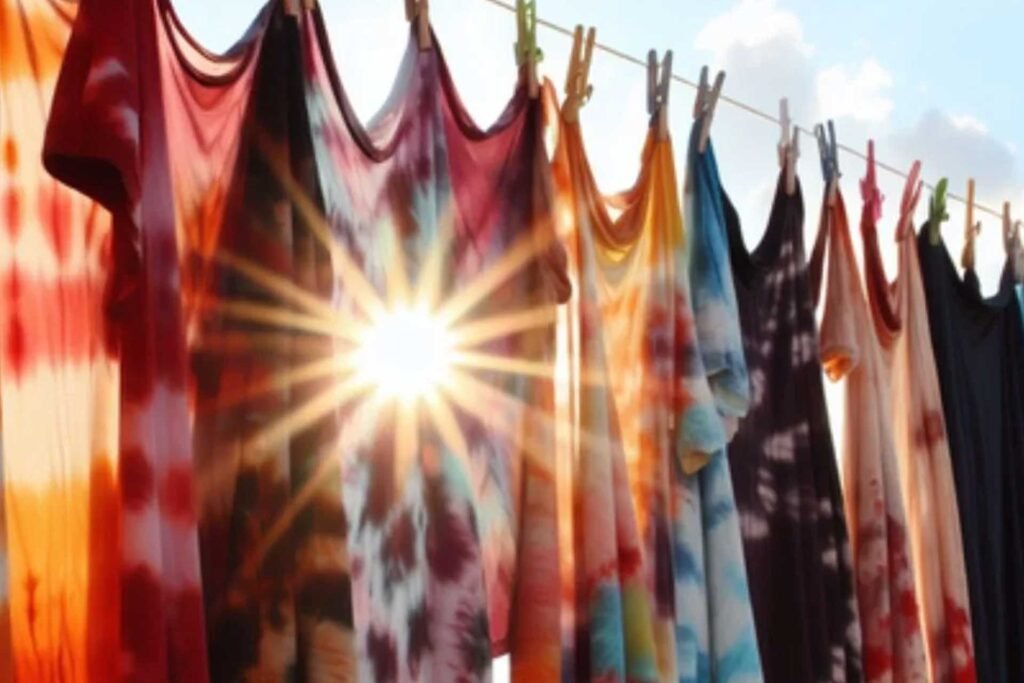
6. Can You Tie-Dye Rayon?
Yes—but use fiber-reactive dye for best results.
Rayon absorbs color beautifully in tie-dye projects, producing:
-
Vibrant spirals
-
Deep saturation
-
Smooth gradients
Avoid high-alkaline solutions that may weaken fibers.
7. Tips for Professional Results
✔ Always test a small swatch first
✔ Use more dye for darker shades
✔ Avoid overcrowding the pot
✔ Maintain consistent temperature
✔ Air dry flat to prevent stretching
8. Is Dyeing Rayon Worth It?
Absolutely—if you follow proper technique.
Rayon:
-
Accepts color exceptionally well
-
Produces rich, bold shades
-
Feels soft even after dyeing
For home projects, dyeing rayon with Rit is beginner-friendly and effective. For long-term durability, fiber-reactive dye is superior.
Final Thoughts
Dyeing rayon isn’t difficult—but it requires care.
Control heat.
Handle gently.
Stir consistently.
If you respect the fabric’s delicate nature while wet, you’ll achieve beautiful, even, professional-looking results.


