In professional fashion design, muslin is more than just inexpensive cotton—it’s a critical development tool. Whether you're testing fit or sculpting directly on a dress form, understanding muslin for pattern making and draping muslin correctly can dramatically improve garment results.
This guide explains which muslin to choose, how to prepare it, and how professionals use it in real-world workflows.
Why Designers Use Muslin for Pattern Making
Muslin is ideal for garment prototyping because it is:
-
Affordable
-
Easy to mark and alter
-
Stable (minimal stretch in plain weave)
-
Press-friendly
-
Similar in structure to many woven fabrics
When designers say they are “making a muslin,” they mean creating a test garment (also called a toile) to check:
-
Fit
-
Proportions
-
Balance
-
Style lines
-
Construction sequence
It allows corrections before cutting expensive fashion fabric.
What Is the Best Muslin for Pattern Making?
Choosing the best muslin for pattern making depends on your final garment.
1. Standard Unbleached Cotton Muslin (Most Common)
Best for:
-
Dresses
-
Blouses
-
Shirts
-
Basic woven garments
Look for:
-
100% cotton
-
Medium weight (around 4–6 oz)
-
Tight, even plain weave
This is the industry standard for general prototyping.
2. Heavier Muslin
Best for:
-
Jackets
-
Structured garments
-
Tailoring practice
A heavier muslin better mimics coating or suiting fabrics.
3. Lightweight Muslin
Best for:
-
Flowing garments
-
Summer tops
-
Soft silhouettes
However, extremely lightweight muslin may distort easily during fitting.
Preparing Muslin Before Use
Professionals never skip this step.
✔ Pre-wash and dry (muslin shrinks)
✔ Press thoroughly
✔ True the grain (align warp and weft threads)
✔ Block and square the fabric
Skipping preparation can lead to inaccurate fit corrections.
Step-by-Step: Using Muslin for Pattern Making (Flat Pattern Method)
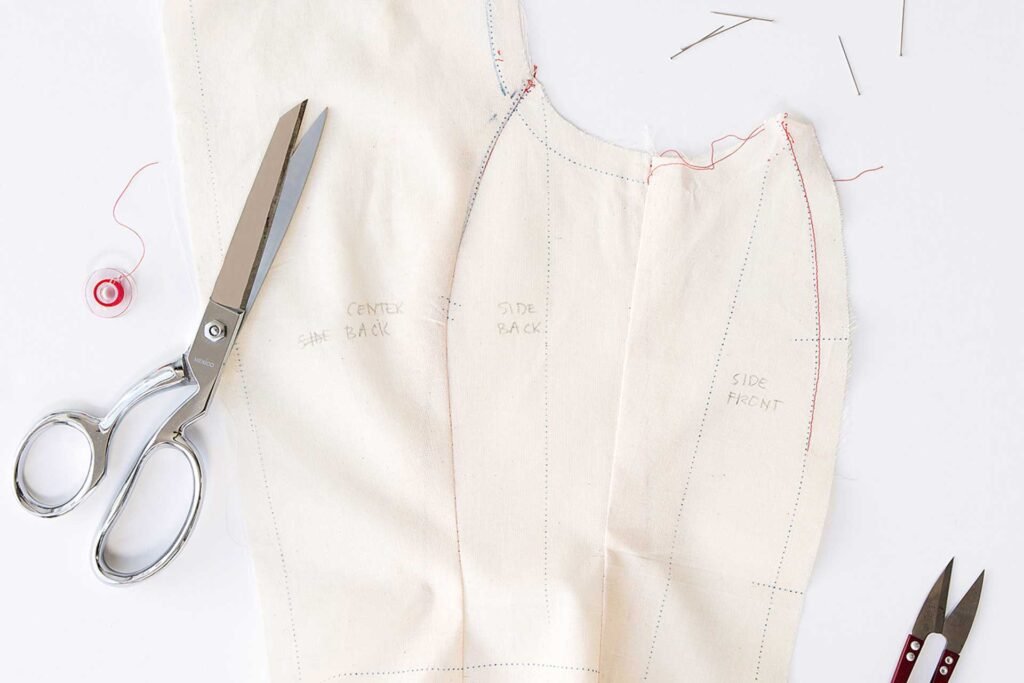
muslin for pattern making
Step 1: Transfer Pattern Pieces
-
Lay pattern on muslin aligned with grainline
-
Trace using pencil or tailor’s chalk
-
Mark darts, notches, seam allowances clearly
Step 2: Cut With Generous Seam Allowances
Many professionals add extra seam allowance (1 inch or more) to allow fitting adjustments.
Step 3: Sew With Long Stitches
Use:
-
Longer stitch length (3–4 mm)
-
Minimal finishing (this is temporary)
Step 4: Fit and Mark Corrections
Pin adjustments directly on the body or dress form. Mark:
-
Bust adjustments
-
Waist shaping
-
Shoulder balance
-
Length corrections
Step 5: Transfer Changes Back to Paper Pattern
This is where precision matters. Update the master pattern before cutting final fabric.
Draping Muslin: The Professional Method
Draping is sculpting fabric directly on a dress form instead of starting with flat patterns.
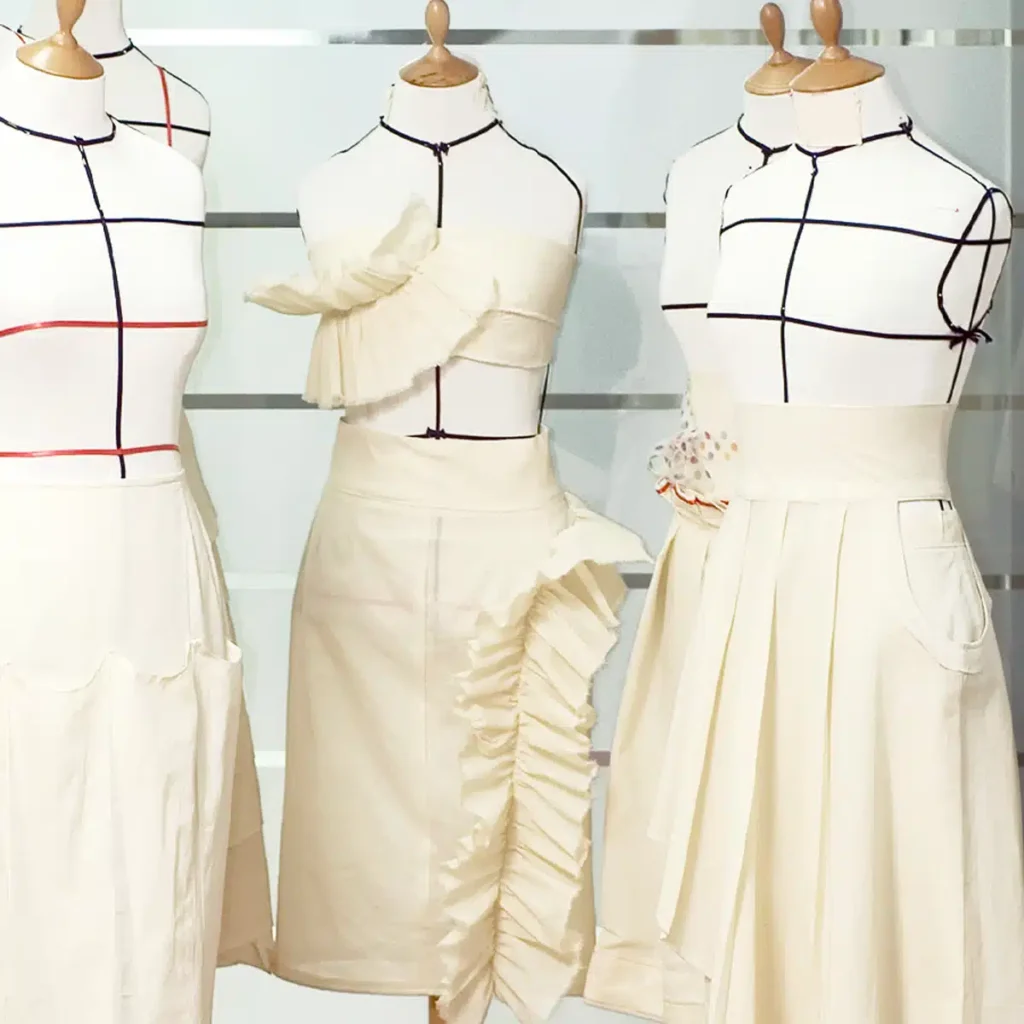
Draping Muslin
Why Muslin Is Ideal for Draping
-
Holds shape when pinned
-
Easy to draw on
-
Stable yet moldable
-
Presses into curves
Basic Draping Process
1. Prepare the Dress Form
-
Mark center front, waistline, and bust line with tape
-
Ensure measurements match your model
2. Cut Muslin Sections
Cut slightly larger than the area you're shaping.
3. Pin Along Grainline First
Always establish straight grain alignment before shaping curves.
4. Shape With Darts and Style Lines
-
Pin excess into darts
-
Draw seam lines directly on muslin
-
Clip carefully to release tension
5. Mark and Remove
Transfer markings to paper to create final pattern pieces.
Pro Tips for Better Results
✔ Use pencil (ink can bleed through)
✔ Always mark grainlines clearly
✔ Work on one side of the body, then mirror
✔ Avoid stretching the bias accidentally
✔ Press frequently while draping
Common Mistakes Beginners Make
❌ Using fabric that’s too lightweight
❌ Ignoring grainline alignment
❌ Skipping pre-wash
❌ Not adding extra seam allowance
❌ Pulling muslin too tightly on the form
These mistakes lead to inaccurate patterns.
Muslin vs Final Fabric: Should They Match?
Ideally, your muslin should approximate the structure of your final fabric.
For example:
-
Structured cotton dress → medium-weight muslin
-
Tailored wool coat → heavier muslin
-
Fluid rayon dress → lightweight muslin (or similar drapey fabric)
Muslin won’t perfectly replicate stretch or drape of specialty fabrics, but it provides a reliable fitting foundation.
When Not to Use Muslin
Muslin is less ideal for:
-
Stretch garments (use stretch test fabric instead)
-
Highly textured fabrics
-
Very heavy outerwear
-
Sheer specialty fabrics
In those cases, use a similar substitute fabric.
Final Thoughts
Using muslin for pattern making and mastering draping muslin are foundational skills in professional fashion development.
Muslin allows you to:
-
Perfect fit
-
Reduce fabric waste
-
Refine design details
-
Improve garment balance
Whether you're a fashion student, home sewist, or emerging designer, learning to work confidently with muslin elevates your craftsmanship significantly.


